
I'm taking another flying leap into new things this Tuesday! A tutorial! I couldn't find the right tutorial for how to make an asterisk block, other than the video on Craftsy. Not everyone loves a video or wants to sign up for another free web membership, so an idea was born!
*** Disclaimer - This project is not my own design. It is a version of a project from sewknitsew. The blogger gives partial instructions on how to make the project, but not the block itself.***
Here we go!
1) Prepare your wedge template and cut your 12 wedge pieces. sewknitsew explains this nicely. Prepare 2 inch strips from the same fabrics. Mix and match your wedges and strips until you're happy with the pairings.
2) Okay, scary bit here. Make a random slice across your wedge using your ruler and rotary cutter. I liked the look of blocks where I made my initial slice low on the wedge.
.JPG)

4) Line up your sliced off portion of wedge with the newly added 2 inch strip. You don't need to fuss about it lining up too much because you're going to be trimming the block eventually. Sew on the sliced off bit and press (again!)
.JPG)
.JPG)
.JPG)


7) Make your next slice through the x created by your inserted strips. Insert the third strip.
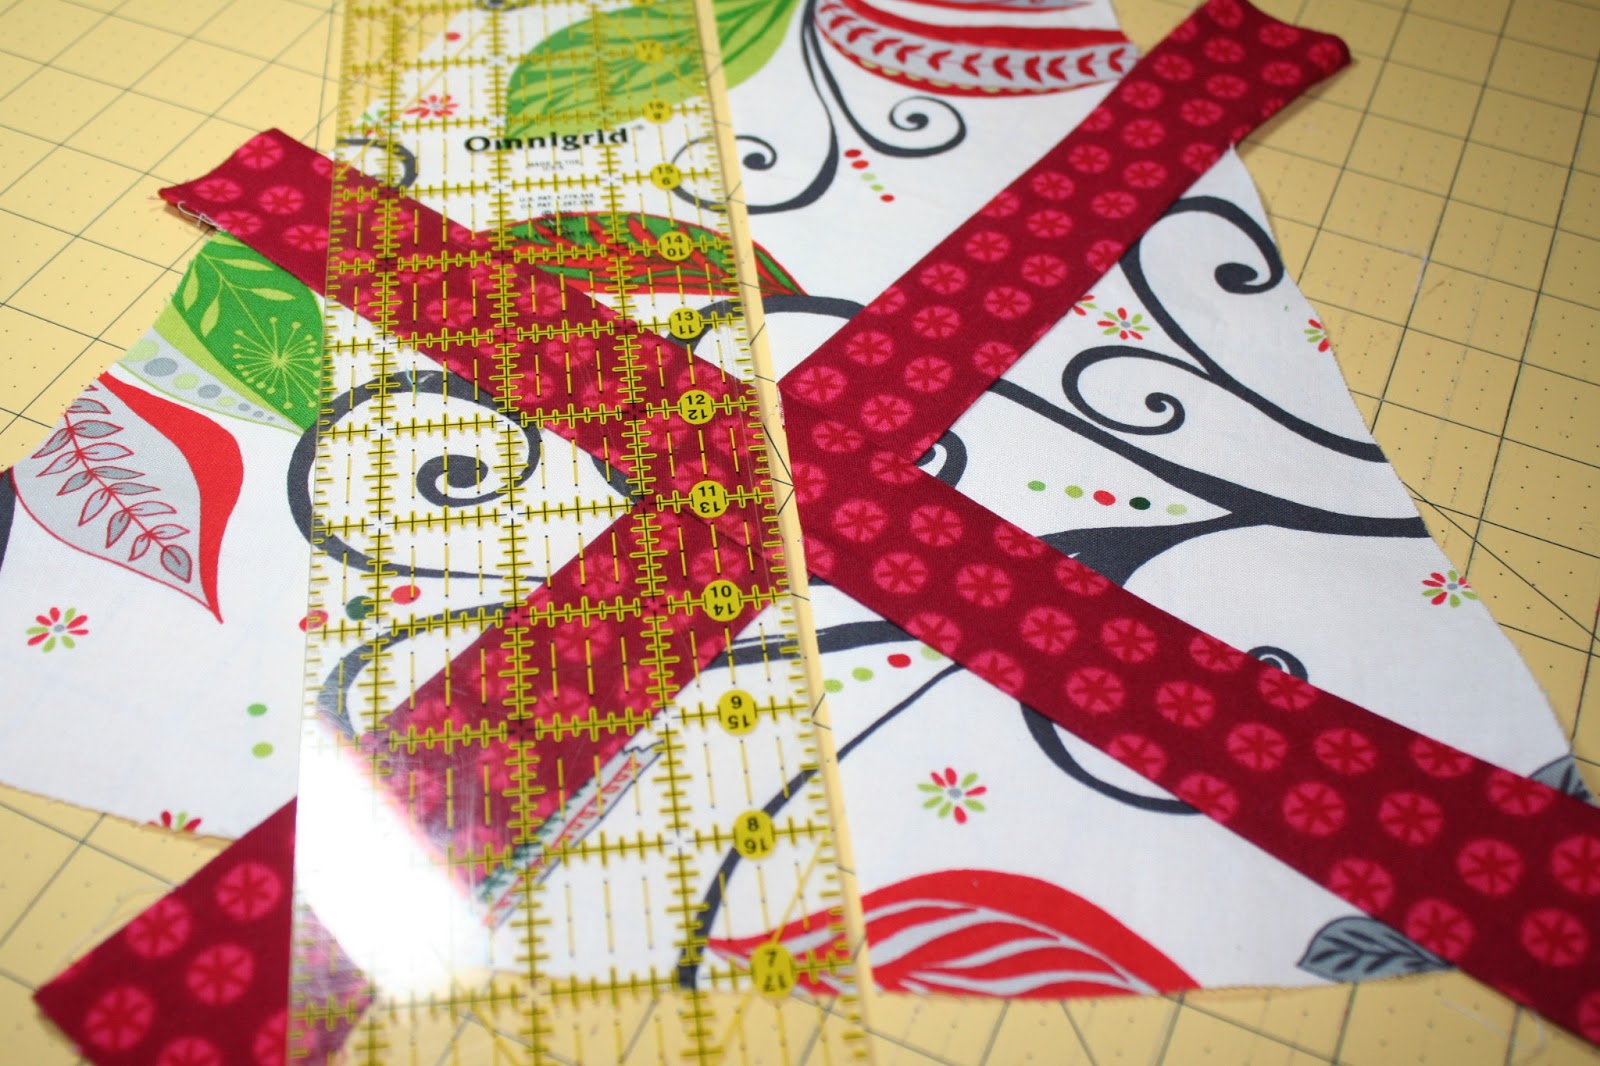
NB: I had a funny thing happen with a number of my blocks. Depending on which way I made the third slice, I got little triangles. It happened with the block in the tutorial. I think the solution is to make the third cut perpendicular to what is shown in the image above...

8) Okay, this is the last time you have to slice up your hard work! Make another slice perpendicular to the third strip. Insert your fourth strip.

9) It's all over but the trimmin'!

.JPG)

Use your ruler to trim the sides...

...and scissors to trim the rounded bottom edge.

.JPG)
After making these wedge blocks, I've started thinking about the possibilities for square asterisk blocks. So many ideas, so little time!
Happy asterisk-ing!
J
.JPG)
Lovely!!! "I'm not normally one to use pins", LOL, but you do give in once in a while. :-)
ReplyDelete