Wednesday, June 29, 2016

Technicolor Galaxy - Time has come...

To start putting this thing together! Lesson 11 was released a few weeks back and I really, really want to complete my Technicolor Galaxy quilt. I'm at a year and half of work here. The time has come!

Before any assembly could begin, a LOT of trimming had to happen...
  Trimmings make me happy...

 So happy...
 The bin is almost full!
Okay... those might not be interesting pics to you. But taking them might allow me to let go of these scraps instead of hoarding them due to prettiness.

The trimming took a long, long time. The freezer paper templates used for the batting and backing had to be trimmed down and ironed to each and every block. Yikes. Wish I could have done that as the blocks were finished, but I was too chicken to do so without the instructor's full explanation!
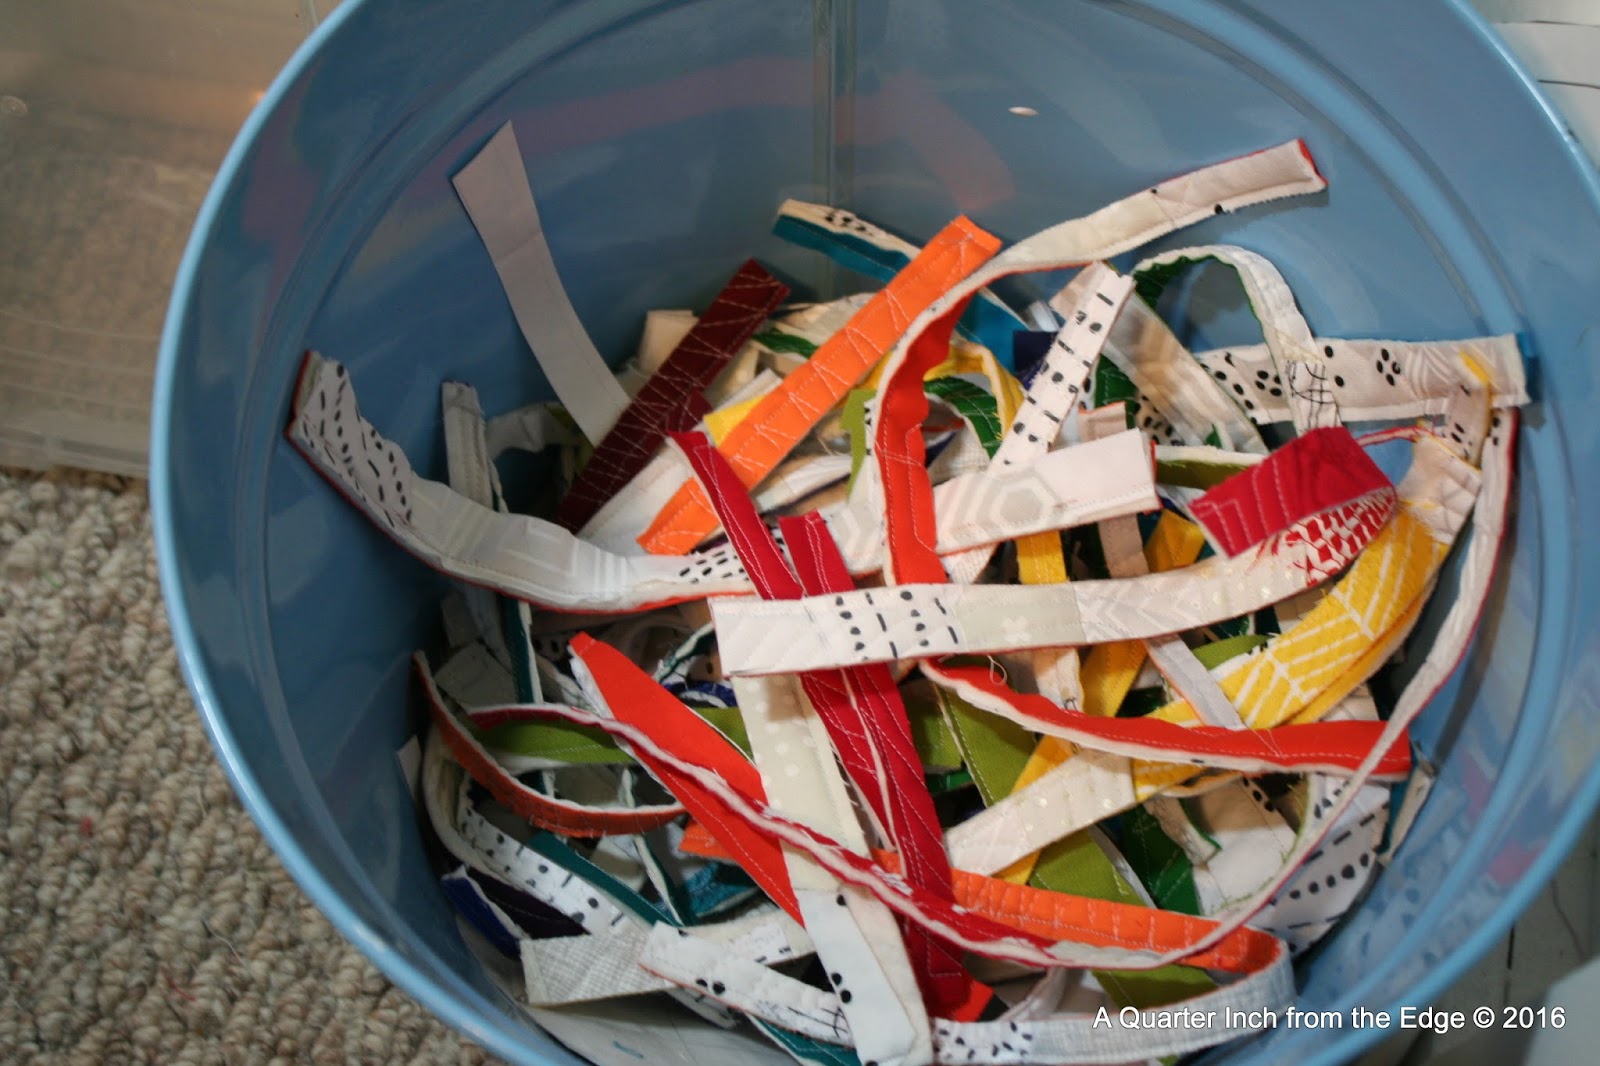
A weird angle, but the best light I managed to snag! All trimmed except the centre medallion. That's not done until the spokes are joined. I love it, but I want it off my design wall.
With all the blocks trimmed, I had to bite the bullet and start making the bias binding. It was so tempting to just do it the way I've done it in the past, but hell... this is a skill builder, right? So I followed Alyssa's directions to the letter!
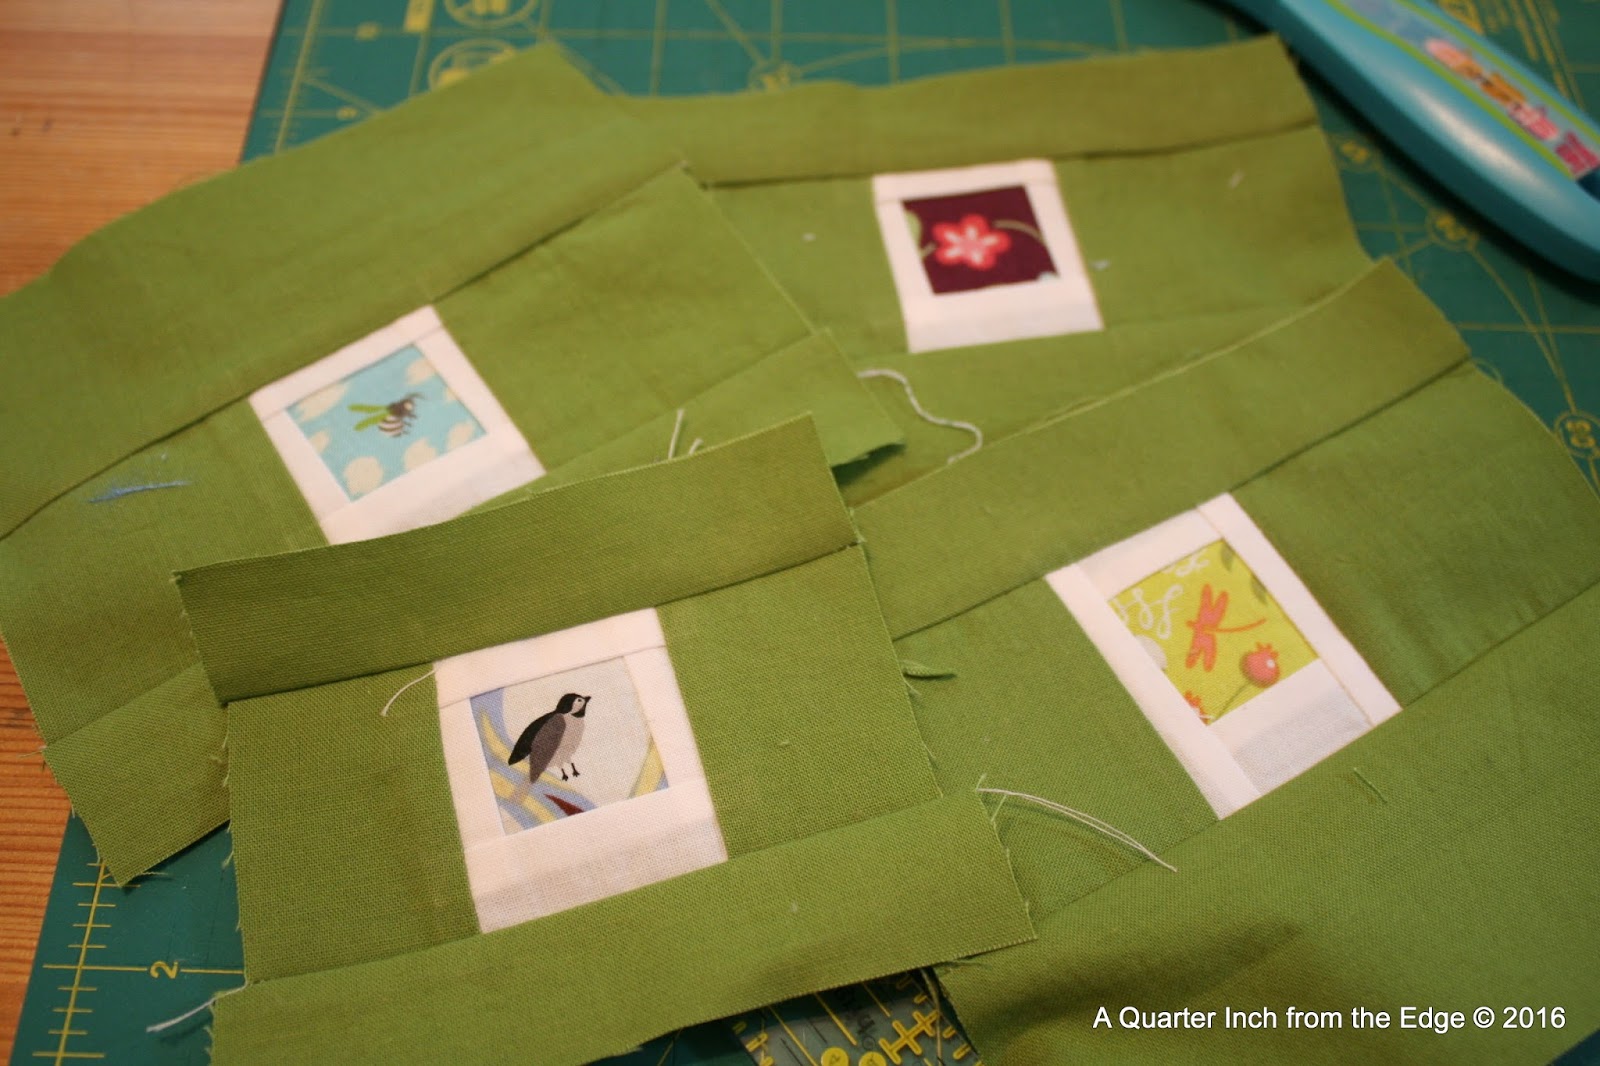
So much marking.... and pinning!
Sewing this strange tube was, well.... strange. But I followed the directions, so it's gotta work, right?
Sharp scissors and an ability to follow the pencil lines = a magical pile of bias binding! Now I just need to make another batch... and two batches of straight grain binding. It's a long, long process this assembly!


I'm linking up with Let's Bee Social @ Sew Fresh Quilts. The lovely Lorna had a slew of giveaways for the last 10 days. She's so generous!

J

P.S. This was one of my goals for Q2 of the 2016 Finish Along.


Tuesday, June 28, 2016

And now for something completely different...

Baby thwarting is a hobby. At least, it is for Himself and I. We spend a lot of time trying to think of ways to keep DT safe and maintain our sanity. This week's issue? GT is climbing out of her crib. We've made changes, but they keep her from seeing BT. Not popular. So pyjama modifications are next up for trial.
Not actually GT. Her escape happened under the cover of darkness!
Wanna know what I did? First step, grab the trusty seam ripper and take out the crotch seam of GT's fav whale jammies.
I used an old tank top of mine to cut a small panel to sew into the seam. I wanted a stretchy fabric and the stash doesn't extend to knits. I even Googled some tips for sewing knits. I used a stretch needle and a zigzag stitch. I even looked up what stitch on my Pfaff would overlock the seam. Yay me! When it came time to inset the panel, it was Wonderclips to the rescue!
And voilà! All ready for thwarting.
It's tricky to climb onto the table or into the armchair, but DT doesn't spend too much time in their jammies. GT can walk and run, but when it comes to lifting her leg to get out of her crib... not so much!
After a trial run in the Pack n' Play where she hopped right out, I had to sew a tuck into the panel to give her less leeway.
And 2 hours later, she's still in bed. One pair down, two to go. Baby thwarting for the win.

J

Monday, June 27, 2016

Mini mini Monday - Polaroids... again!

Yup. There are always more mini minis being created around here! This week's featured mini mini was for our Maritime Modern Quilt Guild swap a couple weeks ago. It's a blind swap - bring one, get one!

I was struggling to come up with an idea when I got to thinking about the Polaroid quilt I made recently. Honestly, I might now be as obsessed with fussy cutting as I am with mini mini quilts.

First step was to find some wee little things to fussy cut. And they happened to be spring-y in theme!
As often happens when I get carried away with a project, I missed taking a pic of just the Polaroid stage. Suffice it to say that the white strips are very, very small. Since the prints made me think of spring, I went with Kona Peridot, a nice rich green, as my background.
 The centres of the Polaroids finished up at 1 wee little inch!
 I quilted the Kona Peridot very densely to really get the Polaroids to pop.
For the binding, I once again used Crazy Mom Quilts' Binding Tiny Things Tutorial. I considered using the Peridot, but thought those little polka dots would liven things up!
For the backing, I used the same polka dots and I used my trusty Pigma pen to sign it. "Snapshots of Spring"... how's that for a name? ☺
How about you? Have you jumped on the mini mini bandwagon? Are you swapping?

J

P.S. I'm trying out a new (to me) Monday link-up, Main Crush Monday @ Cooking Up Quilts. Pop on over and see what others are crushing on this Monday!


Monday, June 20, 2016

Mini mini Monday - Wee Thistle!

You might have noticed in my posts about Glamp Stitchalot that a little someone came along for the adventure. I'm not talking about Anja @ Anja Quilts or Julia @ Jada's Quilting Adventures. I'm talking about Wee Thistle!
She stowed away in my suitcase. ☺She's very wee... just 6½ inches square.
Wee Thistle looks an awful lot like her cousin, Hazel the Hedgehog, designed by Glamp Stitchalot instructor, Elizabeth Hartman. It's not a coincidence.
Her spines are made from Carolyn Friedlander's Dentals in Green from her recent Carkai collection. The rest of the fabrics are Konas - Silver for the background, Storm for the binding, eyes & nose, Green Tea for her face and Peapod for her body.
Here's Wee Thistle with her big sister, Thistle. My initial plan involved taking Thistle with me to Glamp, but she just seemed a bit too.... well, big. And perhaps a little conspicuous. So I enlisted the help of the infamous Dena @ No Frickin' Blog yet. She whipped up a paper piecing pattern for me. What a friend!
As part of my little plan, I had Carolyn and Elizabeth sign the back. There's a souvenir for you! Carolyn was hesitant to sign "I didn't make it!", she said. But I told her that it wouldn't be the same without her fabric. That sold her!  And it was super cool to listen to Elizabeth and Dena chat about how Dena designed the pattern, particularly the spines. And I was worrying about whether she'd be bothered by the adaptation of her Hazel!
And for the record, here's the real Thistle who has long since gone to the great hedge in the sky.
Bless her little spines. I think she would approve of Wee Thistle.

J

P.S. This was one of my goals for Q2 of the 2016 Finish Along!

Saturday, June 18, 2016

Glamp Stitchalot - Day 2!

Are you tired of reading about my adventures at Glamp Stitchalot? It's okay. Feel free to mark as read if you need to!
 
Okay. Day 2. First class of the morning was Rashida Coleman-Hale's. You might know the fabric line she does with a few friends, Cotton + Steel? I was a true suck up and used her XOXO Basic print.
Umm. It was at this point that I realized I had switched my background and plane colours. Damn. Oh well, keep rollin' and call it a design choice!
The majority of the block is paper pieced, but some is pieced construction and the the nose of the plane is a very, very wee curved section. Yikes.
I managed to whip up another block as I had originally planned. Much better! I'm going to make a second one of these to complete the plane row.

I wasn't crazy excited about the plane block, but once I met Rashida, that feeling disappeared. She was so warm and funny, laughing at her own design issues with the block, and making mistakes in her demo to put us at ease!
Can you even believe I'm standing next to a Cotton + Steel founding designer? I was definitely starstruck!

And then things got crazy. Second class, queen of low volume, Carolyn Friedlander. So much paper piecing. Lots of opportunities to use that handy wooden roller!
Carolyn's game changer? For those long pieces that always seem to shift when you're paper piecing, use a basting stitch to hold them in place. I've used glue, but I like the basting as well. Definitely a new idea for me!
I will admit here and now that I am NOT happy with how my blocks came together for Carolyn's class.  It was 100% my design choices, not her block. I tried scrappy. It looks like the dog's breakfast. I'll reveal it when I re-work it! ☺

Our sixth and final class was one I had been looking forward to from the moment I signed up for Glamp - quilting rock star, creator of Hazel and Preppy, Elizabeth Hartman. I will say here and now that my prep work paid off during this session!
 I love the colours that Elizabeth chose for her sample row. As if I ever don't love her fabric choices!
Elizabeth's game changer tip was one I didn't use. I pre-cut all my fabric and didn't fussy cut as she did for the windows and doors. But I'll definitely be doing as she did in the future. She cut a square of freezer paper to the finished size of her fussy cut. Then you can iron it right on the fabric and make sure you have a perfect fussy cut.. i.e. you don't cut off a wee kitty's tail! Then you just add your seam allowance before you cut it out. That's how she got those kitties so perfectly placed!
  And here are my houses! I even finished them during the class!
One of the highlights of this class was this moment...
Introducing Wee Thistle to the person who inspired her creation! More on Wee Thistle at a later date. So many things to blog about. And I swear I am not a giantess. Elizabeth Hartman is wee. Very wee.

Thanks for reading about all my Glamp Shenanigans. Is it wrong that I'm plotting thinking about how I can get to another event like this? It was restful, inspiring, pretty much awesome. I've even been wondering if it's something I could organize. Hmmmm....

J

Monday, June 13, 2016

Glamp Stitchalot- Day 1!

So a while back, I posted about a wild and crazy quilting adventure that Anja @ Anja Quilts, Julia @ Jada's Quilting Adventures, and our friend Dena had signed on for! It was all that I had hoped for and more!
The structure of the week-end included three two-hour classes on Friday and Saturday with the six instructors rotating from classroom to classroom. First up, Monica Solorio-Snow of Happy Zombie and her Binge Watching pattern.
For each instructor, there was at least one game changer moment. Usually it was a tip so simple and perfect that I couldn't believe that I'd never thought of it. For Monica, it was covering a printed template with packing tape on the front and back before cutting it out.
Due to my lack of advance cutting, I didn't make a lot of progress. Well, that and the fact that my templates were printed incorrectly, causing me to have to recut a bunch of triangles. But I did catch up by midnight!
And it turns out that this isn't the first pattern of Monica's that I've made. She designed the Christmas Tree Pants that I made for my parents a while back! 

Next up, Penny Layman (you know, my swap partner BFF). Try not to be too shocked. I actually had my picture taken a couple times over the course of the week-end!
The game changer for Penny's class came in the form of this little wooden wall paper roller. It was a suggested notion for Glamp and I decided to take the plunge. Rolling those paper pieced seams is so much more effective than finger pressing and beats hopping up and down to the ironing board!
She also had a sweet technique for matching up sections called "pinch and pin" using forked pins to really secure those key joints. Even with poor hotel lighting, these mountains are very cute!
Last class of the day was Violet Craft. Curved piecing isn't what I think of when I hear her iconic name. I tend to think Jungle Abstractions and Domino Dot. But this lady knows of what she speaks when it comes to curved piecing.
Violet's game changer? Pin very, very little. "The fabric knows what it wants to do. Let it." Yup. I let it. And it worked. I also discovered that a ¼ inch foot with a guide is not nearly as awful as I thought it was! I will also say that the blocks pictured above are pieced... not appliquéd. True story. I want to make an Orange Peel quilt more badly that ever!

This may sound like the craziest thing ever, but it was amazing to me how down to earth and friendly the instructors were. They're frickin' quilting rockstars with their own fabric lines and publishing deals. But they chatted with each and every student, answering questions, admiring our work, laughing and carrying on. 

Want to read a different perspective on the day? Pop on over to Julia @ Jada's Quilting Adventures to check out my roomie's take. I'll share Day 2 later this week! You can also read about my fabric deliberations and preparation, pouch swap, and fabric haul in past posts.

J